Inverter Running
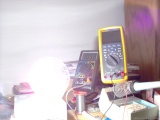
Here's my inverter powering a 300 Watt lightbulb. Not too bad at 7.6VDC in and 110VAC out. It's drawing about 42 amps from what I've calculated.
Inverter Lashup
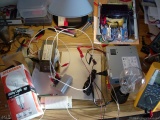
This is a ~400 Watt 7.5VDC to 120VAC inverter. I suppose if I spent time to change the pulse width, I could have a 12V inverter, but oh well. (Yeah, that's what happens when I used a ~17V, center tapped transformer from my APC UPS.) At least I was able to cram it all into a computer power supply box quite nicely. I'm using a CMOS inverter (4049) to drive the FETs that were in my APC UPS. It would probably work pretty good with a 6V SLA, but I just had a modified 15VAC microwave oven transformer with limited coupling fed by my Variac autotransformer.
Custom UPS (Uninterruptible Power Supply)
Here's the finished product! The lash-up you saw in the other photo, namely the relay switching circuit, has been placed into a nice aluminum box in the lower right, (using a double pole, double throw 12V relay.) Above it is the 13.5VDC float power supply. (It's an old linear power supply, but it works good without wasting too much power. The only drawback is the 60Hz hum, which is the loudest 60Hz you'll hear in my room when the ceiling fan is off and no music is playing.) It's connected to the inverter which has two SLA batteries tied to it. The upper SLA is the one that came out of the original APC UPS that got to the point of randomly turning off my computer. ... I blame the stupid “smart” circuits that make too many assumptions. Now I plan to use it's FETs and transformer to make an additional inverter... eventually.
Custom UPS Lashup
So I decided my APC UPS was way too unreliable and decided to make my own, which is what people used to do before it came in a package. However, mine will not stay in phase with the grid frequency, (as if I cared), but it works great! Nothing but a float power supply, 12v SLA battery, high surge inverter, and a homemade switch box to switch to the inverter.
This is the proof of concept shot. At your interest, from this point, I will describe this lash-up from left to right if you continue reading. First, there's a regular car battery charger, a 12V 7AH SLA battery, and the high surge AC inverter (red) with the multimeter (yellow) below it. The charger, battery, and inverter input are of course connected in parallel. The 120VAC output of the inverter is connected to the wires on the socket (small upper white thing) with the hot connected to the NC pin on the relay (small lower white thing with all the alligator clips on it). The socket has a laptop with no battery plugged into it (not shown). The NO pin is connected to the 120VAC hot of the house/grid socket. [Both neutrals on the grid socket and the inverter socket are tied together, but the ground isn't connected on the inverter. This is because I didn't have an available double pole, double throw relay, just a single pole, otherwise the ground would have been shared, and both neutral and hot would have been connected to the relay.] The coil of the relay is powered by 24VDC coming form the silver bridge rectifier, which is powered by the transformer to the right of it, which is powered by the grid. ... And that's it! Turn off the AC grid power and the relay switches to the inverter. It won't be in phase with the grid, but who cares when computers have a switching power supply anyway? [I actually did try powering everything that has a switching power supply with 160VDC or so. Everything worked but my computer, which would start, but wouldn't boot. I didn't bother to mess around with it's power supply though.]
LED Flashlight Measure
This is what the spot looks like from about 5 feet away. The ruler is a 12 inch ruler. I only posted one since the size of the spot is pretty much the same for both the AA and AAA flashlights. Only the intensity is different.
LED Flashlight On
It would be true to say these things could blind someone. ... Maybe they could be used as self-defense.
LED Flashlight
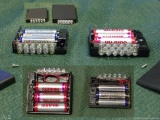
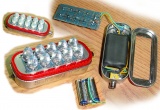
I suppose you could consider this an update on my previous LED flashlight. The small one is about 1 Watt and the larger one is about 1.5 Watts. Each LED (37,000mcd) draws about 20mA at 3.3V. But since the nominal voltage of the NiMH batteries is 3.6V, these LEDs run at about 3.45V, so they get bright!
The case is just a 4 AA or AAA battery holder with a switch. I solder the LEDs in parallel on the board, make four cuts to the holder, and break off the edges. I get the wires where I need them by removing and replacing the cover over the switch, solder the wires in place, and squeeze in the board. A simple homemade flashlight, just mom used to make. ... Okay, maybe not, but it’s handy, especially since it’s brighter than the multiple LED consumer flashlights at the store. I cut off the switch nub on the larger one to prevent it from accidentally turning on.
Cold Cathode Overhead Light
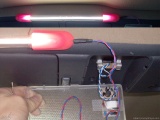
This has replaced my older LED overhead light for some time. The cold cathode came from a laptop screen so it's mounted on an aluminum rim which gives it rigidity and prevents it from breaking. I also added wires inside the tube for support. I could have used a regular cold cathode inverter used in computers, but I used one from a scanner instead.
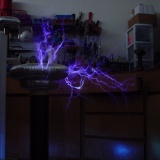
900VA Tesla Coil (Running)
(July 15, 2007)
Picture taken with night mode, half second exposure.
900VA Tesla Coil
(July 15, 2007)
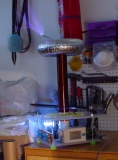
On December 29, 2000, I bought this 15kv/60ma neon Franceformer for $149 to make a Jacob’s Ladder at 14 years old. Before I completely finished my tabletop tesla coil, I thought “Wouldn’t it be nice to utilize something I have lying around.” So I did. Cap bank is 0.0075uF@39kv made from 18 of those cheap $1 oil caps at Alltronics.com. If I run it too long, the caps get a little warm, but no big deal. If I want long run times, I can just use more. Spark gap is made of 7 6” long 0.5” stainless steel pieces of pipe. The gap quencher is just a microwave fan that blows toward itself and the gap. Primary is 17.75 turns of 1/4” diameter insulated limp wire spliced into some harder wire for the taps, tapped at 14.67. Secondary is 4” PVC (4.5” OD) with a winding length of 19.5” of 25 AWG wire coated with polyurethane–970 turns (I counted as I went). Topload is two toroids of 3” aluminum ducting coated with aluminum tape with the bottom diameter of 10” and the top diameter of 15”. It produces 24”-35” sparks.
150VA Tabletop Tesla Coil
(June 30, 2007)
I was looking up flyback transformers on the web and found the tesla coil. The more I looked and the more I tinkered and researched, this was the result five months or so later. It’s powered by a 5kv/30ma 5030 PKM-1 Franceformer. Cap bank is variable from 0.03uF@6.5kv to 0.0075uF@26kv and is tapped at 0.01uF@19.5kv. Finding some cheap caps that would last took some effort, but I found some nice $1 oil caps at alltronics.com. Where you might need about 50 Cornell Dublier for $170 or so, you could just use about 50 of these cheap things for $60 or so. Spark gap is two 2” long 1” copper tube couplings. The gap quencher is a 50 watt 12v vacuum motor from a rechargeable Dirt Devil. Primary is 12 turns of 11 AWG wire 0.5” from the secondary tapped at 7.5. Secondary is 2” PVC (2.375” OD) with a winding length of 13” of 28 AWG wire coated with polyurethane. Topload is 3” aluminum ducting coated with aluminum tape with a diameter of 11” and a fork handle as a breakout. At one point, there was some static buildup on the secondary and it got my attention as I handled it, but it still wasn’t as bad as the shocks I’ve gotten from the doors of some vehicles. It produces 12” sparks.
Altoids Flashlight
(August 1, 2006)
After making my battery, I decided I wanted a smaller, dedicated flashlight, so I used a smaller tin and made my own battery from AAA NiMH cells. (But it does double as a 3.6v battery.) The result was my nicest piece of work. It even looks nice! I made another one a bit earlier with a NiMH cell phone battery. This is the second one.
Altoids Battery
(June 1, 2006)
After making use of the viewfinder, I also wanted to make use of the battery, a very useful thing. Actually not knowing that other people had made Altoids batteries for the ipod, I wanted to use it for everything. Since I have a system of interchangeable connectors and power supplies from cutting off the ends of everything and using RCA plugs on the connectors and RCA jacks on the power supplies’ cord, I wanted more. So, I took a look and started building. It can power my wearable monitor, Nintendo DS, cell phone, MP3 player, and my digital camera, which was being powered by it while I took these pictures. The LEDs I used are 10mm 110Kmcd, very bright. It looks pretty bad on the outside, but it works.
Altoids Battery
(June 1, 2006)
Works as a battery with voltage settings of 3.3v, 3.7v, 5.1v, 7.2v, and max to 8.4v, the battery.
Wearable Display
(December 2, 2005)
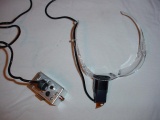
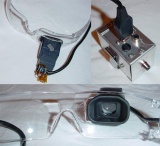
After looking on the Internet at wearable monitors and such I tried looking for a particular Sony Handycam with a micro CRT viewfinder that I had opened before. I was able to obtain one with a broken CCD that looked very similar until I opened it and found a microdisplay. The CRT only had four conductors so it would be easy to make the video connection, but the micro display had many more. But since it was black and white, it only required luminance, h-sync, v-sync, 3.3v, 4.6v, and ground according to the service manual my dad found online. I also found a sync splitter online and was able to make use of the ribbon cable from the step motors that controls the optical block for use as an interface. I got real lucky on that. The clip is from some old measuring tape and the cord is from a SEGA Genesis controller. The box came out better than I expected.
Wearable Display
(December 2, 2005)
Takes any composite or S-video signal for use on a wearable display.
LED Overhead Lights
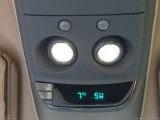
LED replacement lights in action.
Custom Replacement 12V LEDs
(August 16, 2005)
Replaces the standard 12v lamps in a vehicles' interior with LEDs.
Custom Replacement 12V LEDs
(August 16, 2005)
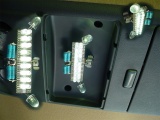
I wanted some LEDs, found a great store (Best Hong Kong) on eBay, got some LEDs and went to work. This is what happened. Yes, the LED in that array is out but I don't care to replace it.
